Canvas顾名思义就是一块画布,可以在上面画一些你想要的东西。
创建一个Canvas有一下两种方法:
- Canvas():创建一个空的画布,可以使用setBitmap()方法来设置绘制的具体画布;
- Canvas(Bitmap bitmap):以bitmap对象创建一个画布,则将内容都绘制在bitmap上,bitmap不得为null;
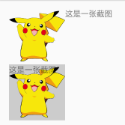
使用Canvas来截图
1 | private ImageView mImageView1; |
上面代码的效果就是:创建了一个尺寸是300*300的Bitmap,使用它作为Canvas操作的对象。首先使用了c.drawColor(Color.LTGRAY)绘制截图的背景颜色,mImageView1.draw(c)把图片绘制在Canvas上,mTextVew.draw(c)把自体绘制在Canvas上,最后用mImageView2把最终绘制的结果显示出来了,如果去掉c.drawColor(Color.LTGRAY)和mTextVew.draw(c),其实就是mImageView1的一个截图,我们可以用截图来保存本地等其他操作。
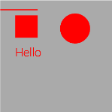
通过onDraw在View中实现各种操作
例子:
1 | @Override |
效果:
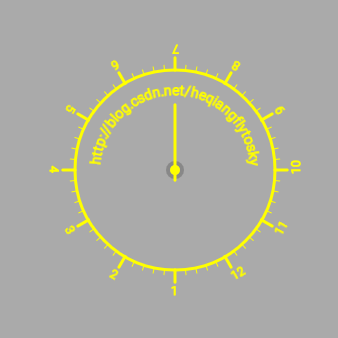
下面再看一个有意思的例子:
http://www.jcodecraeer.com/a/anzhuokaifa/androidkaifa/2012/1212/703.html
1 | @Override |
效果:
Canvas剪切操作
例子:
1 | public class TestView extends View { |
效果:
不剪切

剪切

XOR剪切

Region.Op还提供一下参数供选择:
DIFFERENCE(0),   //相减
INTERSECT(1),
UNION(2),        //并集
XOR(3),          //异或
REVERSE_DIFFERENCE(4),   //逆向差集
REPLACE(5);
还可以参考APIDEMO